Modding the Monoprice Select Mini V2 — Part 1
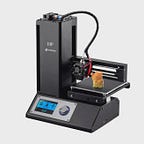
My interest in the hobby and time-sink of 3D printing began with the Monoprice Mini V2.

Where I was, to where I am
With some initial bed level-ing and adjustments, I was printing relatively well and learnt to dial in the machine’s printing a little better each time.
Not too long after producing some great prints, I ran into a motherboard failure, in which the pins to the hotend no longer produced any power.
After a positive experience with customer service, leading to a full refund of the device, I was now left with a new project; bring new life to the MPSM V2!
This project has led me down the path of replacing a significant amount of parts to make the following machine

The current upgrades and additions include:
- MKS Gen L replacing stock motherboard
- Full Graphic Smart Controller clone replacing LCD screen
- TMC2208 stepper drivers
- E3D V6 Clone Hotend (stock hotend mount) replacing stock MPSM V2 Hotend (I believe stock for MPSM V2 is an E3D V5)
- Filament sensor
- Notcua fan replacing stock hotend fan, with 2 more within the case for air intake and exhaust
- Glass plate with magnetic bed for easy print removal
- X-axis support with LED strip
- Octoprint (rear, case mounted RPi 3, powered via PoE)
- Webcam mount for use with Octolapse plugin and monitoring
Part 1 will cover:
- Replacing the Motherboard
- The Full Graphics Smart Controller
Replacing the motherboard

The decision to use the MKS Gen L as a replacement board was due to Franks 3D Shop series on MPSM improvements:
Having a video guide was super useful, as I’d never undertaken a 3D printer upgrade, let alone part replacement process.
Part 1 and Part 2 offer a comprehensive guide of improvements for the printer, with a complimentary Thingiverse page full of parts to assist with the modification and Firmware to flash on to the board.
Make sure to print the MKS Gen L bracket from Thingiverse for the MPSM prior to installation

With my stock board dead and no other 3D printer available, I resorted to flashing the board and testing it outside of the machine.

I used a plastic container precariously sitting underneath the printer, to hold the guts of the machine, whilst it printed the motherboard bracket in two parts.

The Full Graphics Smart Controller
The previous picture shows the Full Graphics Smart Controller clone which I now use as my LCD screen.

I ran into a couple of issues when initially using this screen
Backwards Connector Pins
After plugging the LCD in, I was met with backlighting, but not visuals.
Turns out that the clones are often sold with the pins on the rear in the wrong layout.

The fix, shown in the video below, is to pull off the black fittings and rotate them 180 degress, so the notch faces upwards.
Incorrect timing
My second issue appeared with the screen showing garbled looking lettering similar to the image below

This issue was caused by incorrect timing, which can be solved by adding the following in the Firmware’s ‘Configuration.h’
// Additions for display issues
#define ST7920_DELAY_1 DELAY_NS(0)
#define ST7920_DELAY_2 DELAY_NS(400)
#define ST7920_DELAY_3 DELAY_NS(0)
A couple of threads which I used to discover this fix, are found on GitHub and Reddit.
I don’t understand this issue entirely, but the above additions to the Firmware worked.
Once the device was working correctly, I printed the ‘display-left.stl’ and ‘display-right.stl’ from the following Thingiverse page

This is where I cheated a little and where the current state of my machine remains incomplete; I didn’t use a cover and I currently have some spacers underneath each of the prints, allowing the USB-A to USB-B cable to stick out the front of the printer.

I have not yet re-attempted to print the front cover for the controller, with the original print (prior to many modifications) turning out very poor.
Many inconsistent spaces between screw holes led to it being almost impossible to mount correctly.
At the time of creating this guide, I have not yet decided on a solution for USB connection, so the loose cable works fine for the meantime.
Once mounted, I also replaced the stock, blue dial with a better fitting, black dial.
As a final touch, I edited the Firmware to state ‘MPS Mini Ready” as a default message when idling, by changing the printer’s name.
You can edit the printer’s name within the ‘Configuration.h’ section within the Firmware.
Navigate to the section with ‘#define CUSTOM_MACHINE_NAME’
The section will look like what’s shown below.
// Optional custom name for your RepStrap or other custom machine
// Displayed in the LCD "Ready" message
#define CUSTOM_MACHINE_NAME "PLACE YOUR CUSTOM NAME HERE"
Remember to place the name of your printer within quotation marks, as shown above.

Part 2 will cover:
- TMC2208 stepper drivers
- Glass plate with magnetic bed
- Notcua fans